Showing posts with label Heart. Show all posts

Thursday, March 7, 2013

Easy DIY Heart Wall Art

I wanted to spruce up my daughter's bedroom plain walls. The DIY heart wall art is a project that you can recycle and decorate at the same time!  The best part it did not cost nothing to make because I had the old wire coat hangers and the scrap fabric. The DIY heart wall art is really easy to make. This is perfect for a little girls room

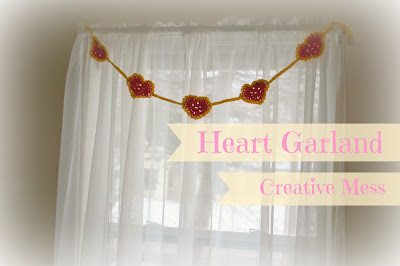
As you can tell there is a heart fad going on in her room. Can you see the heart garland that I crochet hanging across the window? You can find the Easy Crochet Heart here. This heart theme purely by accident. But I think it fits her well because she wears her heart on her sleeves. Even at the age of 6, her heart keeps getting broken.......sigh.......yes......by a boy. I know, she is too young for this. All she wants is for him to be her friend and to quit running from her when she says hi. She just wants to play. This poor girl cried when he completely ignored her. She waited until she was in the car to let loose the tears. It broke my heart to see her this way. I do not remember having this problem at that age. I was too interested in my toys and playing outside.  If this is what I am dealing with at 6 in a half, what is it going to be like in 10 years? I am thinking I am in a world of trouble.....sniffle.

Now on to the DIY Heart Wall Art. As you can see I made three hearts, two pink and one white.

DIY Wall Art
Photo Source: Creative Mess


Using large wire cutter, I cut off the curved hook, this will be the bottom of the heart. Using pliers bend and shape the wire hanger into a heart. It does  not have to be perfect.

I had some scrap fabric that I cut into long stripes that is one inch wide. The pink fabric is cotton and the white is an old lace curtainYou could use any kind of material, such as ribbonburlap, or even yarn. Let your imagination go wild.

I secure one end of the fabric to the crease of the heart with some hot glue and stretch the strand to the outer edge of the heart, again with some hot glue. I kept going until I was satisfied.

You could experiment different ways of using the fabric and create a whole different kind of pattern.
DIY Wall Art
Photo Source: Creative Mess 
I hung it on the wall using small nails. You will notice in the photos how the hearts is not 100% flat which is fine. I think it gives it a nice old look to it. Also a shabby chic look.

My daughter loves her hearts. Now if I can figure out  a way to make her forget about the boy who keeps breaking her heart, I will be satisfied... ; p


Where I party!

Thursday

Design, Dining, and Diapers
Common Ground
Creative Thursday
Made in a Day
Chase the Stars
The Shabby Nest
A Peek Into My Paradise

Friday

Wednesday, February 20, 2013

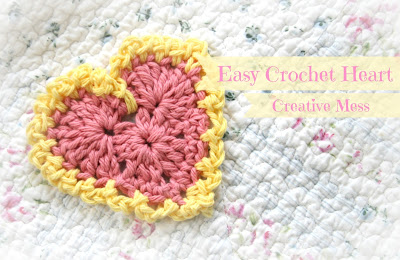
Easy Crochet Heart

I know some of you are sick of seeing hearts now that Valentine's Day is now over. However, I wanted to share this because it really wasn't for Valentine's day. I was experimenting with a easy crochet heart pattern that I found. I made some of my own changes and then turned it into a garland for my daughter's bedroom.

Easy Crochet Heart
Photo Source: Creative Mess

Here is the link to the original pattern, Large Lacy Heart. Also, if you are into looking for some more patterns for crochet, be sure to check out the site. I must warn you, you could spend hours looking because there is so many patterns.

Easy Crochet Heart
Photo Source: Creative Mess
Easy Crochet Heart
Photo Source: Creative Mess
My daughters room is kinda blah. I really wanted to do something to make it girly and colorfull. As you can see outside there is no sun and there is snow. It has been grey for days, really depressing. I am so ready for the warm weather! How about you? So I came up with this cute heart garland. I finished it last night and hung it up while she was sleeping, so that she could wake up to this surprise.


Like I said, I found the original pattern here. Below is what I did with my changes for the easy crochet heart.


Abbreviations:

hdc = Half double Crochet
dc = Double Crochet
sc = Single Crochet

Supplies:

two colors of worsted yarn: I used Lily Sugar' n Cream Rose Pink and Yellow Sunshine


Crochet Hook 5.50 mm


Color 1


Round 1: Ch-4, join with slip stitch to first Ch to form ring; Ch - 1; [ 3 hdc in ring, Ch - 2 ] 4 times; join with slip stitch to the first hdc. You should have a total of 12 hdc and 4 Ch - 2 spaces

Round 2: [ 9 dc in center hdc of the next 3-hdc group, slip stitch in the Ch - 2 space ] 2 times; sc in next 3 hdc, sc in next Ch - 2 space, sc in next 3 hdc; join with slip stitch to the first hdc. Finish off.


Color 2


Round 3: Right side facing, join color 2 with slip stitch to second sc of second 3 sc group....Note: this confused me. To make it simple it is where the bottom point is. Ch - 3, slip stitch in same sc, [ Ch - 3, skip the next sc, slip stitch in the next sc ] 2 times, [ Ch - 3,  slip stitch in next hdc, Ch - 3 ] 9 times; working over next slip stitch, slip stitch in Ch - 2 space on round 1...Note: this is the dip that gives it shape for the heart. [ Ch - 3, slip stitch in next hdc ] 9 times; Ch - 3, slip stitch in next slip stitch, [ Ch - 3, skip next sc, slip stitch in next sc ] 2 times; Ch - 3; join with slip stitch to first sc. Finish off. Weave the ends.


This is what I did for the garland that I made, you could use any method that suits you best:

I made 2 of these for the ends so there is slack to tie = Ch - 30; turn and sc back; Finish off
I made 3 of these for in between the hearts = Ch - 15; turn and sc back; Finish off
Attach the lines on wrong side of heart.

Enjoy!

Monday

Monday, February 11, 2013

Pinterest Monday #1: Cute Valentine Inspirations

Pinterest anyone? I love pinterest. I think I am addicted to it. Wait....I know I am addicted to Pinterest...LOL! Pinterest is my dream land. If I am not careful, I can get lost hours at a time and that would not be too productive, Right?

I have decided that I would start a weekly post on what I find on Pinterest and post my favorites. Since Mondays seem to be the day that most are dragging,  I thought it would be nice to have a Monday to look forward to and be excited about. I know that when I am on Pinterest, I am like that guy you see who gawks at the muscle cars. Yep, that is me drowling all over my computer...lol!


Lets welcome Mondays to jump start our week with Pinterest Mondays


You can follow me on Pinterest.

Pinterest Mondays #1


Since Valentine's Day is just a few days away, here are some favorite cuties that I found on Pinterest.

To go to each of the projects, you can click on the title and it will take you to the direct site of the rightful owners of the projects.

Stamped With Love

Felt Envelope
Photo source: Clever Charlotte
This is a cute little envelope made out of felt. Perfect for the little ones!

Valentine Emoridery

Embroidery
Photo Source: Living Well Spending Less
This emoridery looks simple and cute for a little Valentine decorating around the home.

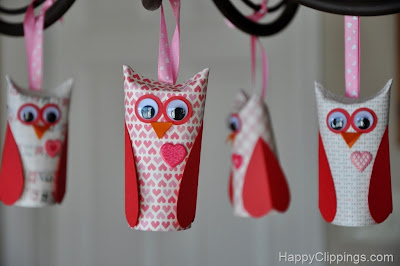
DIY Valentine Paper Roll Owls

Paper roll Owls
Photo source: Happy Clippings
My dad would be so happy if I started reusing and recycling. This project you can do just that! Out of toliet paper rolls! Who knew there were more uses for those rolls...lol!

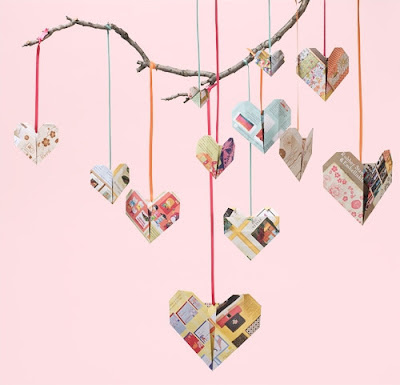
Origami Hearts

Origami Hearts
Photo Source: Paper Source Blog
Here is another project for reusing and recycling. These cute little origami hearts are easy to make!

Valentine Pom Monsters

Valentine Pom Monsters
Photo Source: Create Craft Love
Instead of Cupid, what about these little love monsters!
They are cute and look easy to make. What a great kid activity
These would also make cute Valentine gifts for the class mates.

Burlap Doily Luminaries

Burlap Doily Luminaries
Photo Source: Crafts by Amanda
Here is another one that you can easily recycle those old canning jars for these lovely luminaries.
These are so darling that you could keep them around all the time, not just for Valentine's day.

Valentine Heart Project

Paper hearts
Photo Source: Creative Mess
Here is what I made with my daughter for her 100th day school project. It turned out and she was so happy to play with mommy's craft punch.

ENJOY!

Be sure to check back soon! I have been working on some Valentine's Day projects that I will need to post. I can't wait to share!

See you next week for Pinterest Monday!

Places that I Party:


Tuesday


Blogging tips